Tutorial #7
Working With Difficult Descriptions - X, Y Coordinates
This tutorial will shows how to work with a description that contains unusual calls that cannot be entered directly using any of the usual data entry tools. The example below shows how to enter a description that contains X,Y coordinates.
Note: This tutorial was written using v4.4.0 of Metes and Bounds. If you are using a newer version, your screenshots may vary. But the basic functionality should be the same. Also, this tutorial assumes that are using a registered Pro version. If you are using the Basic or Unregistered version, not all of these features will be available.
Setting Up the Drawing.
To create a new drawing, choose New Drawing from the File menu.
On the Drawing tab, choose "Center of Drawing" for the drawing's origin.
Click on the Scale popup menu triangle and choose the 1" = 330' menu.
Rename the current layer by choosing Rename Current Layer from the Layers menu. Rename the layer as 'Main Drawing Layer'.
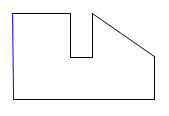
The first call is a straight forward line call and can be entered as:
E 646.5
The second call is an angle call. It can be entered by using the Data Entry form and choosing Angle Minus, or it can be entered manually by entering:
- 89:24 196
The third call is much trickier as it is not a true call. To enter this call, the x,y coordinate of the last call in the Main Drawing Layer must be found. The x,y coordinate of the location pointed to by the third call must be found as well.
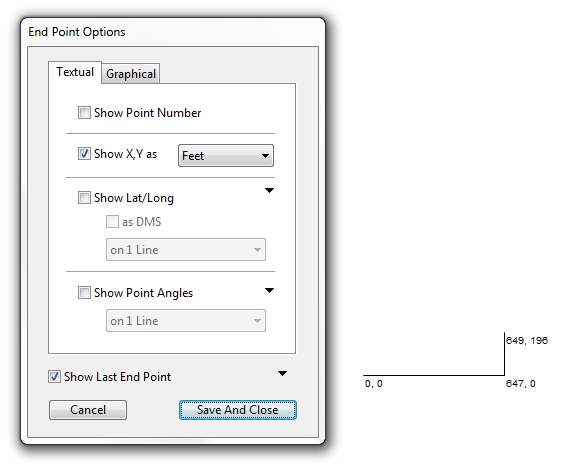
Start by opening up the End Point Options form and checking the Show X,Y checkbox. Make sure that the Show Last End Point box is checked as well. This will provide the last x,y coordinate for our Main Drawing Layer.
To find the x,y coordinate pointed to by the third call, start by creating a new layer called Offset Layer. Choose Add New Layer from the Layers menu to create the new layer.
Now, in Offset Layer, enter the two directions and distances given for the third point to find the second x,y coordinate.
N 391
E 363.9
Configure the end points for the Offset Layer the same as the Main Drawing Layer.
This provides the two x,y coordinates that are needed to create the third call.
Under the Tools menu, choose Convert X, Y to Layer.
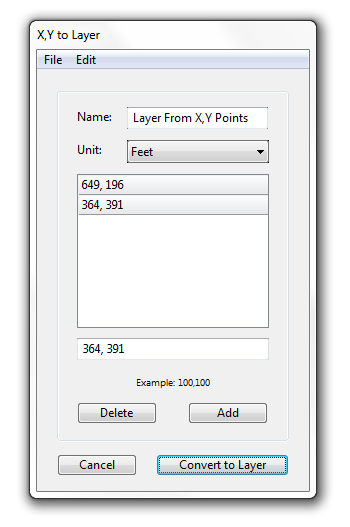
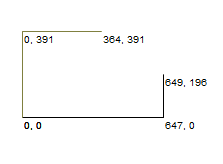
Enter the set of x,y coordinates (649, 196) from the Main Drawing Layer first. Then enter the x,y coordinates (364,391) from the Offset Layer. Press the Convert to Layer button to create a new layer.
Note: Additional decimal points for the x,y coordinates of each layer can be found by choosing Show Layer X,Y Point Coordinates under the Calculate menu.
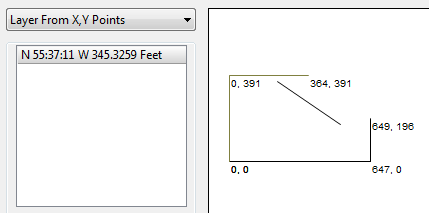
This new layer contains the call for the 3rd call of the Main Drawing Layer. Choose Copy Current Calls from the Edit menu to copy the new call.
Now, switch back to the Main Drawing Layer and choose Paste Calls into Current Layer from the Edit menu. This will paste the 3rd call into the Main Drawing Layer.
To clean up the drawing, choose Set Non-Current Layers Invisible from the Layers menu. This will turn off the temporary working layers. Open the End Points Form again and uncheck the Show X,Y checkbox.
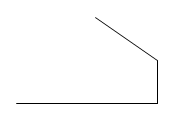
The drawing should now look like this:
Now enter the remaining calls:
S 200
W 100
N 200
W 263.9
Check the Auto Complete checkbox to return to the POB.